designed for the way women work.
Growing Bulbs Indoors!
Category: How-To Projects, Plant Ideas & Info, Presenting "The Curious Gardener"

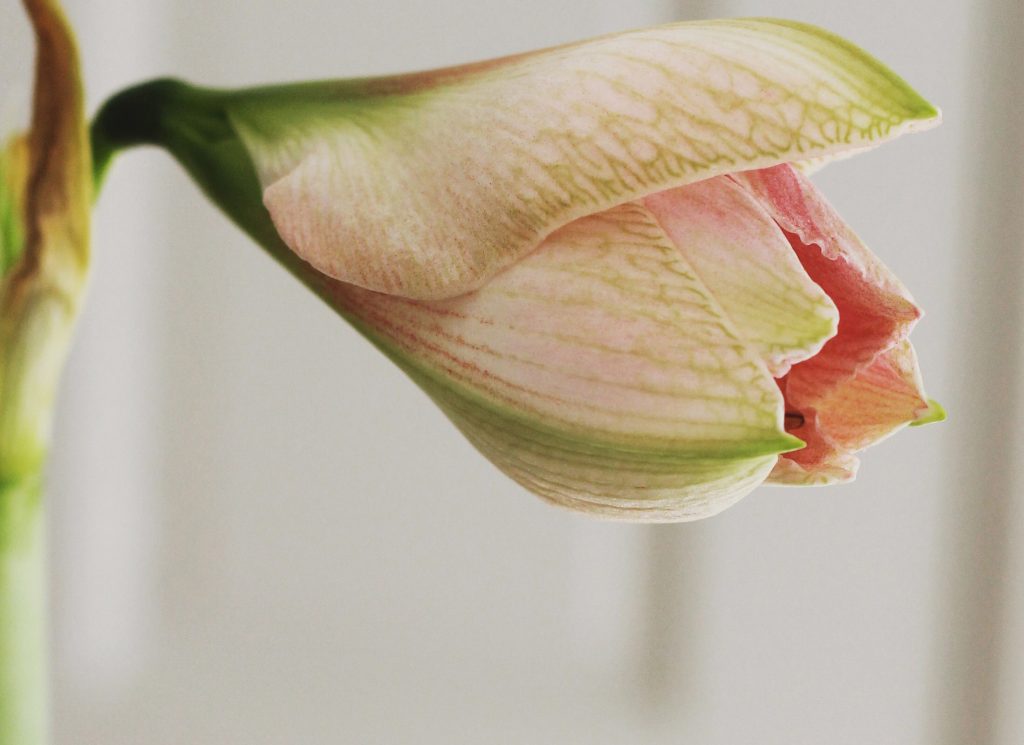
Amaryllis and paperwhite bulbs blooming exuberantly around the house are now a part of my winter garden tradition. I like to have paperwhites for the holidays and I enjoy amaryllis from January through March. I stagger the planting so there’s always something blooming. For paperwhites I allow 3-5 weeks to bloom, and for amaryllis, 6-8 weeks.
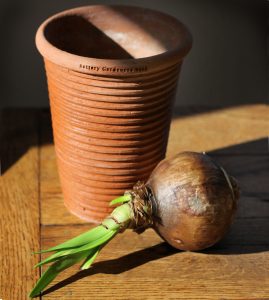
Growing Amaryllis— I usually select the largest bulbs I can find because they produce larger and more abundant flowers. Be sure they’re firm to the touch.
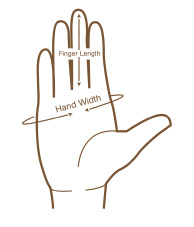
To start, choose a favorite 6-8″ wide container, with a drainage hole, and fill it with potting mix. To determine the best size container, you should be able to just get your finger between the bulb and the container all the way around. Make sure it’s heavy enough that it won’t topple over when the top heavy amaryllis is in bloom.
Place your bulb in the mix with the nose end up, leaving about half of the bulb exposed at the top. The grower I got my bulb from recommends immersing the bulb in lukewarm water for an hour before potting it up. They say it encourages the formation of roots.
Water sparingly until you see new growth, at which time you should increase the amount of water and light you give your plant. You don’t want the soil to dry out completely, but you also don’t want your bulb sitting in water. That will cause the roots to rot.
You can also plant your bulb in stones instead of potting mix. When planting in stones, select a container without drainage, otherwise the water will drain out immediately and won’t provide any benefit to the roots. When watering keep the water level just below the bulb so it reaches the roots only. If you use a see through glass container you can see where the water level is. The stem will likely be shorter than normal when planted in a glass container.
Each blossom can last for two weeks and one bulb will produce more than one flower.
Reblooming Next Year— After flowers fade cut down the flower stalk and continue to water. Fertilize once a month. You can plant the pot and bulb in the garden during the summer months. In September bring the pot and bulb indoors and start withholding water. Let foliage dry. Store in a cool dark place with no water or fertilizer for 8-10 weeks. In mid November add some fresh soil and start re-watering.
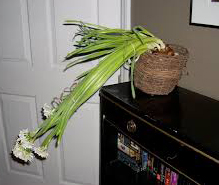
Growing Paperwhites— I usually plant mine in a glass container filled with stones. Press your bulbs into the stones nose up, and leave some of the top of the bulb exposed above the stones. When planting in stones use a container without drainage holes, otherwise the water will drain out immediately and won’t provide a benefit to the roots. Fill the container with water just up to the base of the bulb. Put in a well-lighted area but not in direct sunlight. Paperwhites are much more difficult to get to rebloom another year, and most people don’t bother trying (myself included). Throw your bulbs in the compost pile when they’re spent!
Stunting the Growth of Your Paperwhites— Follow this recipe to shorten your paperwhites and prevent them from toppling over when they bloom.
- Pot your paperwhites in stones and water, as you normally would.
- Once the roots begin growing and the green shoot on top reaches about 1-2″, pour off the existing water.
- Replace the water with a solution of 4 – 6% alcohol, as described below.
- Continue to use the alcohol solution for future watering.
You should see results in a few days.
Recipe for Alcohol Watering Solution
- The alcohol content needs to be less than 10%, or your plants will overdose and severe growth problems will occur. Many liquors are only labeled as “proof”, not percentage of alcohol. Don’t confuse the two. To determine what percentage alcohol you have, divide the proof in half, So an 86 proof bourbon is 43% alcohol.
- You can use any hard liquor (vodka, tequila, whiskey…) or rubbing alcohol. Don’t use wine or beer because they are too high in sugar.
- Check the bottle for the percentage alcohol.
- You will have to do some math to get the different concentrations of alcohol down to 4-6%.To convert your booze to 5% alcohol, just divide the percentage alcohol by 5 and then subtract 1. That will tell you how many parts water to mix with your 1 part alcohol. Ex: 40 divided by 5 = 8: 8 minus 1 = 7… 7 parts water to 1 part alcohol.Or simply use this chart:
Convert Existing Alcohol to a 5% Solution for Watering
10% Alcohol = 1 Part Water to 1 Part Alcohol
15% Alcohol = 2 Parts Water to 1 Part Alcohol
20% Alcohol = 3 Parts Water to 1 Part Alcohol
25% Alcohol = 4 Parts Water to 1 Part Alcohol
30% Alcohol = 5 Parts Water to 1 Part Alcohol
35% Alcohol = 6 Parts Water to 1 Part Alcohol

Thanks Dorian, I have my bulbs sitting in a bag, this will inspire me to get them potted up and growing!
Thank you for the details on Amaryllis bulbs, including re blooming. Most company’s don’t share that detail.