designed for the way women work.
How To Make Maple Syrup
Category: How-To Projects, Presenting "The Curious Gardener", Recipes, Tools & Techniques
Many people who might otherwise consider making their own maple syrup are put off by the numbers. Forty gallons of sap yields 1 gallon of syrup. What?
My friend Debbie Battaglia is a seasoned vegetable gardener, so she is accustomed to receiving the bounty of her hard work in the form of something tasty that she can share with family and friends. She is also attracted to projects that involve building something, so when she learned that there was a ‘kit’ for building an outdoor stove to boil sap she was sold.
I spent an afternoon with Debbie recently while she talked about the process she follows, which she claims is the simplest way to make syrup for a small operation like hers. “Because it’s so labor intensive,” says Debbie, “most people who have made it themselves will never again say store bought is too expensive.”
This is her second year making maple syrup and she has already produced about 3 gallons of syrup this season. (So that’s 120 gallons of sap!) Her enthusiasm is infectious.
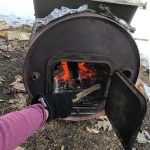
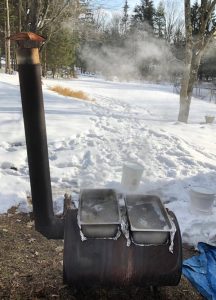
Sap is usually boiled outdoors because of the amount of steam it releases. To build her outdoor stove, Debbie started with a 55 gallon drum given to her by her car mechanic. She fitted the drum with a flue collar and damper, a door and feet, all of which were part of the kit she purchased locally. She then purchased and installed a stove pipe. Click here for a video on building a stove.
Once she had a working stove Debbie started collecting the sap from trees on her property. You can use sap from other types of trees, but sugar maple trees have the highest content of sucrose.
Debbie uses 2-1/2 gallon aluminum buckets with peaked roof lids that hang on metal spiles drilled into the tree trunks. In a mature tree with a large enough trunk you can safely put more than one tap in it, and this year she has 15 taps on 11 trees. Sap will run into the bucket when temperatures are warm (in the 40’s fahrenheit) after a night of below freezing temperatures. When sap is gushing you can fill a bucket in a day. 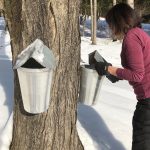
After collecting sap she builds a wood fire in the stove. She uses scavenged wood and cut offs from a local wood shop for fuel. Only when necessary does she supplement with wood she purchased for her indoor stove.
With a good fire going Debbie pours the sap into restaurant grade stainless steel trays that she fits into holes she cut into the drum. As the sap boils down she keeps adding more sap and stoking the fire to maintain or raise the temperature. It can be an all day affair. Click here to see and hear Debbie describe this process.
The temperature needs to reach about 7 degrees higher than the boiling point of water, which is 212 degrees. When the sap has boiled down to about 1 inch in the pans, and is about 210 degrees she brings it indoors and puts it on her stove for a couple of hours to reach 219 degrees. Indoors, in regular cooking pots, it’s easier for her to monitor the temperature as it reaches the point at which it becomes syrup. Click here for Debbie’s explanation of this part of the process.
The last step is to filter the syrup through a felted wool filter lined with paper. Did I mention Debbie was wearing her Womanswork Thinsulate Lined Winter Work Gloves the whole time she worked?
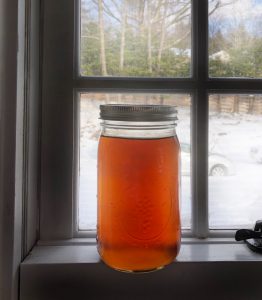
Voila!
The following story is reprinted from a March 2012 interview I did with another local syrup maker, Mark Chipkin.
Like many things that are worth having, homemade maple syrup rewards planning and some trial and error. I spoke with neighbor Mark Chipkin about his maple syrup operation and was surprised on one hand that you can tap a tree in the morning and have maple syrup later that same day. On the other hand, I was surprised how much sap it takes to make a little bit of syrup.
Mark is a retired science teacher and Chairman of the 1,000 acre Pawling Nature Reserve, owned by The Nature Conservancy. He approaches syrup-making like a science experiment, tinkering with the variables and recording the results of each batch he makes. He and his wife Brenda make about 3 gallons of maple syrup a year, and they use it as an all purpose sweetener for pancakes and french toast as well as yogurt, winter squash, coffee and tea. They also give away some of their harvest to friends and neighbors.
Last year they got their best results around the first week of March, tapping their 4 largest and oldest maples, each with a 4-5’ diameter. This year they decided to tap some of the younger maples on their property, each with a 10-12” caliper. The mapling season ends around the end of March in our area. Some say when the trees start to bud it’s time to stop. If you tap too late the sap starts to turn a little bitter.
Interestingly, maple syrup has also become a local industry. Crown Maple is a young company on an 800-acre tract of farm land in the town just north of where I live in Pawling, NY. With 30,000 taps and 14,000 gallons of USDA Organic syrup scheduled for the 2012 season, the company already has the distinction of being the largest producer of maple syrup in New York State. The owners got into the business as a way to preserve the majestic maple groves on the farm for future generations, and they do everything in a sustainable way, including the building and operating of their plant facility. I had a tour of Crown Maple in the fall and met their Chief Syrupmaker, who they liken to the Chief Winemaker at a vineyard.
To make your own maple syrup at home, follow Mark Chipkin’s step-by-step instructions below:
Step 1: Drill a hole in your sugar maple tree (Acer sacharrum) about 1-1/2” deep using a 5/16” bit. (If you are worried about your tree, remember the hole closes up and heals quickly at the end of the season after you pull out the tube). If you’re not sure whether your maple is a sugar maple, you can tell by the fall foliage. It turns bright orange.
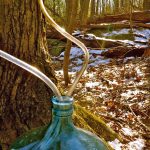
Step 2: Place a spile, or tubing spout, into the hole about 5/8” in. There are several different kinds of metal and plastic spiles available inexpensively on line. The end of the tube will go into a bucket or plastic jug which can hang on the spile. The sap will flow out of the tree, through the tube and into your jug on a warm day after a cold night. The sap flows best after a night with below freezing temperatures, followed by a sunny warm day. One tap can produce a gallon or more of sap on a warm day.
Step 3: Pour sap into a big pot and boil it. Mark puts his pot on top of the wood burning stove he uses to heat his house. It’s a slow boil that can take a full day to boil down 3 or 4 gallons to the right consistency. You can also boil outdoors on a grill or over a fire pit, or boil indoors on your kitchen stovetop. He experiments with finishing off the syrup at different temperatures. If the final temperature at which you remove the syrup is too low (212°) the yield of syrup will be too runny and may be more susceptible to mold formation. Too high a temperature or forgetting to watch the pot and you may end up with solid crystal maple candy. At 217° the syrup goes into a furious, frothy boil, and that’s what he looks for.
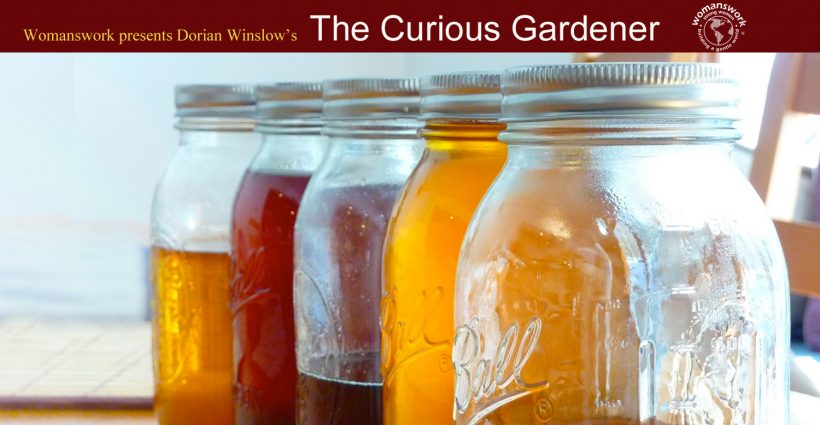
Step 4: After the sap is boiled down to a consistency he likes he pours it through cheesecloth (to filter out ‘maple sand’), directly into a canning jar. When he puts the lid on the canning jar it seals the contents inside, helping it stay fresh longer, up to perhaps 6 months or more in the fridge. If you properly can the syrup it will last for years without refrigeration.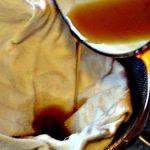
All in all, Mark and Brenda collect about 100 gallons of sap to 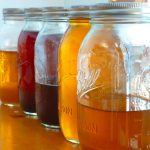 yield 3 gallons of syrup. It’s hard work carrying the gallon jugs back and forth between the trees and the house and monitoring the consistency of the sap as it boils, but it’s also a fun, satisfying and tasty winter hobby.


I WORK IN A BOOKSTORE IN BETHANY BEACH, DELAWARE AND WAS LOOKING INTO GARDENING BOOKS BY RUTH CLAUSEN AND SAW THIS SITE. LOVING ALL THINGS OUTSIDE, I NOW WOULD LIKE TO GO COLLECT MAPLE SAP IN THE WINTER. LOL REGARDLESS, I LOVED THIS ARTICLE AND DEBBIES INSIGHT INTO THE MAPLE SYRUP PROCESS. IT DOESNT SURPRISE ME THAT SHE WOULD FIND SUCH A HOBBY WHEN SHE CANT BE DIGGING HER HANDS IN THE SOIL IN THE WINTER THIS SEEMS TO BE AN AWESOME ALTERNATIVE AND KEEPING HER OUTSIDE.
THANKS SO MUCH FOR PUTTING THE ARTICLE OUT THERE AS IT WAS VERY INSIGHTFUL!