designed for the way women work.

“The Curious Gardener” March, 2012
Category: How-To Projects
In this issue
Learning Seed Propagation at NY Botanical Garden
Make Your own Maple Syrup
Welcome Spring with a Farm-To-Table Brunch
Learning Seed Propagating at NY Botanical Garden–
I am taking a plant propagating class at The New York Botanical Garden with one of their best instructors and a lifelong plantsman, Michael Ruggiero. It’s a treat to learn from him.
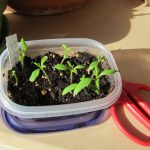
Last month in “The Curious Gardener” I talked about selecting seeds from mail order seed catalogs. In this article I will take you through the process of sowing those seeds indoors, following some of the lessons Mike Ruggiero teaches in his class at NYBG.
Step One: Use a growing medium that is sterile and fine textured.
What does this mean? Seed starting mixes available in stores are usually a mix of sphagnum peat moss and other sterile ingredients such as perlite or vermiculite. Sterile mix helps prevent a fungal disease that can kill off seedlings, and it reduces weed development because it contains no foreign seeds. The term “soiless” applies to this mixture because neither peat moss , perlite nor vermiculite are soil. Peat moss comes from sphagnum moss, perlite is a volcanic mineral and vermiculite comes from mica. Mike recommends a mix that doesn’t have fertilizers in it, because fertilizer is not needed until after germination, and it runs the risk of burning the seed.
Step Two: Select a Container —Any container that is 2” deep with drainage holes will do. Be sure to wash it thoroughly before using. Be aware that peat pots tend to dry more quickly than plastic containers and moisture may wick off into the air.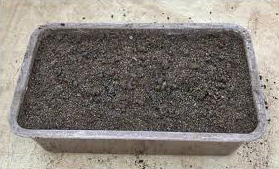
Step Three: Put Growing Medium into Container —First, put your soiless mix in a trough and add hot water. Work it with your hands (wearing lightweight garden gloves) until your mix is uniformly moist but not soaking wet. Fill your container to the top with the mix. Tamp it down lightly and uniformly, using something flat such as the bottom of another container. Peat moss retains moisture for a long time, which makes it a good medium for plant germination. Mike recommends moistening your mix before sowing seeds so you don’t have to water them afterwards and risk disturbing them.
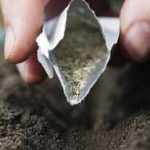 Step Four: Sow your Seeds —Use a pen to create shallow rows in your container. Gently drop seeds along the row from the seed packet rather than from your hand. If too many seeds drop in one spot gently nudge them apart with your pen tip. After seeds are sown, cover them with some of your soiless mix that has not been moistened. Mike showed us how to gently sift the mix through a screen , just covering the seeds and preventing any larger particles from obstructing the seed. Read the seed packet to determine how much to cover the seed. Some seeds need full light to germinate and shouldn’t be covered at all.
Step Five: Germination —The two things seeds need for germination are moisture and warmth. Cover your container with plastic to simulate a warm, moist greenhouse environment. In this way the moisture in the growing medium will probably stay moist under germination without further watering. Put your container somewhere warm-ish, but not in direct sun. The top of a refrigerator is the right temperature, but a radiator is too warm. Check your seeds often so you know when they germinate. Once they do, they need to move to the next stage right away.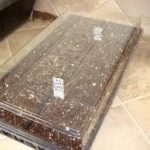
Step Six: After Germination Occurs —As soon as your seeds germinate the most important thing they need is light. Remove the plastic top off the container and put them in the light. They no longer need a cozy warm environment and in fact will become stronger plants if they are in a cooler place at this stage (check individual seed requirements, but daytime temps of 65 to 70° and nighttime temps of 55 to 60° are adequate, on average). However, if their roots dry out they will die immediately, so be sure to water them, but not too much! Watering from the bottom is a gentler way of watering your seedlings, but do not let your container continue to sit in water once the soil is moist.
At this stage, it is important to fertilize your seedlings because your growing medium is not providing any nutrients. Water weekly with a light solution of liquid plant fertilizer (Mike suggests a solution that is 1/2 as weak as what the label recommends).
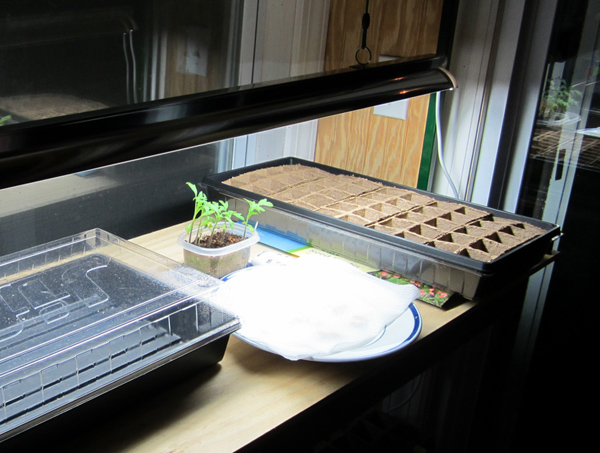 Seedlings ideally want 16 to 18 hours of light a day. I bought a grow light on a stand from Hydrofarm. It was pretty easy to set up and I placed it on a table in my new greenhouse. I plan to start seeds in a few weeks. After they germinate I will move them to the grow light station so they get 16 hours of light a day. This yields bushier, healthier plants. The first sign that seedlings are short of light is when they become too spindly or ‘leggy’. They are just reaching for the light.
If you don’t have grow lights then your seedlings will have to make do with less light. But grow lights are not expensive and can be purchased as a single bulb on a stand with a bendable arm that you can position just above (about 6” above) your seedlings. A fluorescent bulb will work also. Grow lights provide light without heat.
Step Seven: Write it Down —One of the first lessons Mike teaches is the importance of keeping records of what we do so we learn what works in our growing environment, which differs from everyone else’s growing environment. Make a chart that has key dates on it, such as sowing, germination, pricking out (putting in individual containers), potting (transplanting to 4” pots) and fertilizing. For each seed you plant, fill in the chart as you go. Be sure to include the name of the plant, the seed company and date on the seed packet. It’s ok to use seeds from previous years, but expect the rate of germination to diminish from year to year, even if you store the seeds properly. Proper storage means putting the seed pack in a sealed plastic bag in the produce drawer of your refrigerator, which should be about 40°.
Visit your Botanical Gardens. I’m so grateful to have a resource like The New York Botanical Garden (and Mike Ruggiero) not too far from where I live. Every visit, whether I am taking a class or not, is an educational experience. Many towns have their own botanical gardens. You can learn a lot and get ideas for your own gardens there.
Make Your own Maple Syrup
Like many things that are worth having, homemade maple syrup rewards planning and some trial and error. I spoke with neighbor Mark Chipkin about his maple syrup operation and was surprised on one hand that you can tap a tree in the morning and have maple syrup later that same day. On the other hand, I was surprised how much sap it takes to make a little bit of syrup.
Mark is a retired science teacher and Chairman of the 1,000 acre Pawling Nature Reserve, owned by The Nature Conservancy. He approaches syrup-making like a science experiment, tinkering with the variables and recording the results of each batch he makes. He and his wife Brenda make about 3 gallons of maple syrup a year, and they use it as an all purpose sweetener for pancakes and french toast as well as yogurt, winter squash, coffee and tea. They also give away some of their harvest to friends and neighbors.
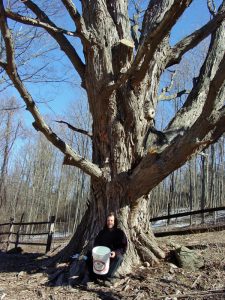
Last year they got their best results around the first week of March, tapping their 4 largest and oldest maples, each with a 4-5’ diameter. This year they decided to tap some of the younger maples on their property, each with a 10-12” caliper. The mapling season ends around the end of March in our area. Some say when the trees start to bud it’s time to stop. If you tap too late the sap starts to turn a little bitter.
Interestingly, maple syrup has also become a local industry. Crown Maple is a young company on an 800-acre tract of farm land in the town just north of where I live in Pawling, NY. With 30,000 taps and 14,000 gallons of USDA Organic syrup scheduled for the 2012 season, the company already has the distinction of being the largest producer of maple syrup in New York State. The owners got into the business as a way to preserve the majestic maple groves on the farm for future generations, and they do everything in a sustainable way, including the building and operating of their plant facility. I had a tour of Crown Maple in the fall and met their Chief Syrupmaker, who they liken to the Chief Winemaker at a vineyard.
To make your own maple syrup at home, follow Mark Chipkin’s step-by-step instructions below:
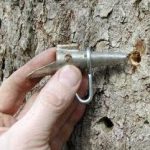
Step 1: Drill a hole in your sugar maple tree (Acer sacharrum) about 1-1/2” deep using a 5/16” bit. (If you are worried about your tree, remember the hole closes up and heals quickly at the end of the season after you pull out the tube). If you’re not sure whether your maple is a sugar maple, you can tell by the fall foliage. It turns bright orange.
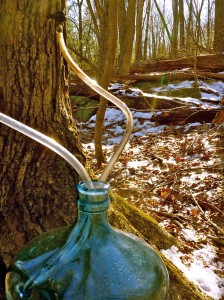
Step 2: Place a spile, or tubing spout, into the hole about 5/8” in. There are several different kinds of metal and plastic spiles available inexpensively on line. The end of the tube will go into a bucket or plastic jug which can hang on the spile. The sap will flow out of the tree, through the tube and into your jug on a warm day after a cold night. The sap flows best after a night with below freezing temperatures, followed by a sunny warm day. One tap can produce a gallon or more of sap on a warm day.
Step 3: Pour sap into a big pot and boil it. Mark puts his pot on top of the wood burning stove he uses to heat his house. It’s a slow boil that can take a full day to boil down 3 or 4 gallons to the right consistency. You can also boil outdoors on a grill or over a fire pit, or boil indoors on your kitchen stovetop. He experiments with finishing off the syrup at different temperatures. If the final temperature at which you remove the syrup is too low (212°) the yield of syrup will be too runny and may be more susceptible to mold formation. Too high a temperature or forgetting to watch the pot and you may end up with solid crystal maple candy. At 217° the syrup goes into a furious, frothy boil, and that’s what he looks for.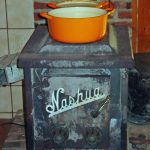
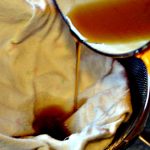
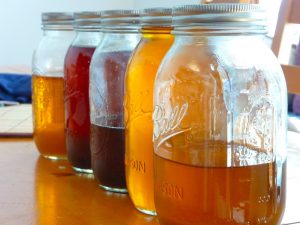
Step 4: After the sap is boiled down to a consistency he likes he pours it through cheesecloth (to filter out ‘maple sand’), directly into a canning jar. When he puts the lid on the canning jar it seals the contents inside, helping it stay fresh longer, up to perhaps 6 months or more in the fridge. If you properly can the syrup it will last for years without refrigeration.
All in all, Mark and Brenda collect about 100 gallons of sap to yield 3 gallons of syrup. It’s hard work carrying the gallon jugs back and forth between the trees and the house and monitoring the consistency of the sap as it boils, but it’s also a fun, satisfying and tasty winter hobby.
Photos for this story were provided by Mark Chipkin and his syrup making ‘mentor’ Jeremy Wolff.
Welcome Spring with a Farm-To-Table Brunch
We have decided to celebrate a new holiday in our family. It is the first day of Daylight Savings. It’s not quite Spring, but it’s close enough. Last year we had a “Spring Ahead” brunch and found that brunch is a great time to serve local foods such as farm fresh eggs and apple cider donuts.
This year we “Spring Ahead” on Sunday March 11th. Here are some ideas for a Sunday brunch to welcome spring where you live.
Flowers—What says spring better than tulips and daffodils? Call your local florist ahead of time so you are sure to get your first choice of tulip colors. If you plan ahead you can also force some spring bulbs in a pot or grow an amaryllis for the occasion as I have done.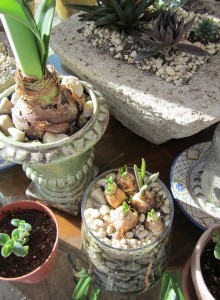
Menu—We have egg-producing chickens so their eggs go into a large platter of scrambled eggs with asparagus. We serve thick bacon from a local farm. The Hudson Valley is a farm rich region, and there is no shortage of meats, produce, fresh water seafood and locally produced wine available within 60 miles of where we live. Some items, such as apples and blueberries, are stored during the winter by farmers so they are available year round. Here is our menu:
- Roasted Asparagus with Scrambled Eggs (made with our own eggs)
- Ham Biscuits with local ham
- Fresh baked Blueberry Muffins (with our own eggs and local blueberries)
- French Toast Casserole (with local maple syrup)
- Apple Cider donuts from Salinger’s Farm (in the next town over)
- Cut up fresh fruit
I like to let people know what they are eating so I made little cards to put with each item.
By April, I’m already out in the garden and it would be hard to coax me inside for a daytime party, but in March we’re still indoors enjoying the warmth of a burning fire and thinking of Spring ahead.


