designed for the way women work.

“Creating A Landscape Berm” by Dorian Winslow
Category: How-To Projects
Early last Spring I woke up one morning and decided that what my yard needed was a berm. Most berms, or mounds, are designed for privacy to block an unwanted view of the street or a neighbor’s backyard. By creating a little hill and planting it with trees and other vegetation you can create a very attractive and effective screen. Fences are often used for this purpose too, but a berm is a more natural-looking solution.
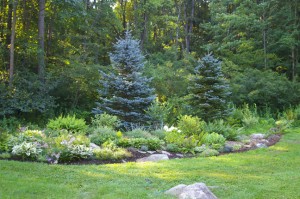
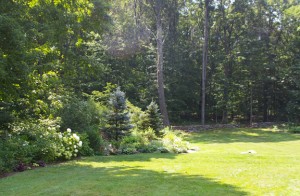
In my case I was trying to create visual interest in a part of my yard that was dominated by two spruce trees that have been struggling to become established since I planted them 3 years ago. In addition, the trees sit in a low area of our yard and lots of weeds and even poisin ivy had started to take over. Rather than clear out the bad, I decided to bury it under a nice big pile of wood chips.
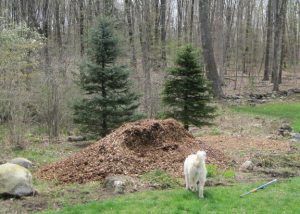
First I called my local supplier of mulch and top soil and asked them if they would deliver a truckload of woodchips, which they did. They were able to drop it right on the spot where I needed it. After grabbing my landscaper’s rake and putting on my favorite pair of leather garden gloves, I spread it evenly across the area (what a workout!) and realized I needed another truckload. After that was delivered I had enough chips to create a 2′ high berm over an area of approximately 20′ X 30′. I piled them in front of the trees and left the ground around the trunks undisturbed. Since the ground was low in that spot some of the chips just helped level the ground.
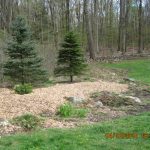
A more sensible approach is to use top soil because it is more stable than wood chips. The problem with a pile of wood chips is they are full of air and they will settle and sink, lowering the height of your berm. But wood chips are much easier to move around and I wanted to try different shapes to see what would look best from a few different vantage points. Next Spring I will probably have more wood chips (or top soil) delivered and shore up my berm again.
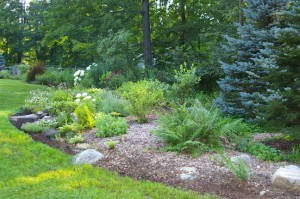
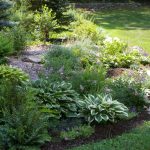
Once I had the shape in place I started planting a few shrubs and perennials. I selected 2 flowering weigela and a red chokeberry shrub to plant in front of my two spruces. As they get larger I will probably transplant them to another location, but this year they were the perfect screen to hide the thinnish lower branches of my spruces, while not blocking the sun which spruces need. In front of the shrubs I planted catmint nepata and basket of gold (aurinia) with its silvery leaves and bright yellow blossoms; and baptisia carolina which did not bloom this year. We have some lovely large rocks that form a gentle slope along one side of the berm and I uncovered them and swept them off with my little bonsai broom so they would become a focal point of the berm also.
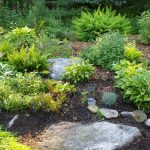
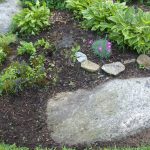
I left several hosta and ferns along the lower, shadier side of the mound. Left undisturbed, they thrived.



Beautiful berm, beautiful photos!
I was excited to read your blog entry because I did a similar thing in my garden outside Boston five years ago. Most people thought I was nuts, but I filled in a shady drop-off with the wood chips from three trees that had to come down. I planted rhodos, mountain laurels, azaleas, yews and a variety of woodland perennials. Like you, I made big planting holes and filled them in with brought-in soil. I thought it would be a while before I had to do more than water, but it turns out that every year I have to add a lot of manure to counteract the nitrogen-stealing that the rotting wood chips actively engage in, shovel a couple of yards of soil onto the areas between shrubs and add mulch (more wood chips!) since the shrubs’ roots get exposed quickly when the surrounding soil sinks. The good news is that the sinking is almost over and the dirt is great! Now the perennials I added have a bit of rich forest to live in instead of a wood pile and are beginning to spread. So it looks like it takes about five years to transition from chip heap to soil. Other benefits to this method: the surrounding large trees don’t seem to suffer from having airy chips dumped on their roots the way they would from dense soil, and the shrubs avoided competition with tree roots as they were establishing themselves.
Thank you for this perspective. It’s very helpful!
Very useful post and useful comment by Pamela. Thanks!
Thanks for a wonderful site. I will be back
This is very inspiring! I have a large berm that was created by dumping sod in the back of my yard. My husband says leave it and we will plant into it. There is alot of bittersweet running though it and I feel it needs to be broken down and rebuilt to rid it of the invasive bittersweet. Any suggestions? I am excited to incorporate the berm into the back border of our property.
Dorian, this article on creating a perfect landscape berm is brilliant, and I want to thank you for sharing this article here. Your information has helped me finish my landscaping project.
The most common type of berm is a landscape berm, which is created with soil, rocks, and vegetation. The berm is designed to be the same height as the existing fence, creating a seamless barrier and a sense of privacy. This type of berm can also be used for soundproofing, providing a buffer from street noise. Furthermore, a berm can be an attractive addition to the landscape, providing a visual barrier and an attractive aesthetic. Planting trees, shrubs, and flowers along the berm can create a lush and vibrant landscape.