
By now most of us have seedlings that have germinated and will be planted outdoors in 4-6 weeks. Here's what you do with those seedlings, step-by-step. This method was learned at the NY Botanical Garden (NYBG).
After Germination Occurs —As soon as your seeds germinate the most important thing they need is light. Remove the plastic top off the container and put them in the light. They no longer need a cozy warm environment and in fact will become stronger plants if they are in a cooler place at this stage (check individual seed requirements, but daytime temps of 65 to 70° and nighttime temps of 55 to 60° are adequate, on average). However, if their roots dry out they will die immediately, so be sure to water them, but not too much! Watering from the bottom is a gentler way of watering your seedlings, but do not let your container continue to sit in water once the soil is moist.
At this stage, it is important to fertilize your seedlings because your growing medium is not providing any nutrients. Water weekly with a light solution of liquid plant fertilizer (NYBG suggests a solution that is 1/2 as weak as what the label recommends).
 Seedlings ideally want 16 to 18 hours of light a day. Grow lights will help you achieve this, and it helps yield bushier plants. The first sign that seedlings are short of light is when they become too spindly or ‘leggy’. They are just reaching for the light.
If you don’t have grow lights then your seedlings will have to make do with less light. But grow lights are not expensive and can be purchased as a single bulb on a stand with a bendable arm that you can position just above (about 6” above) your seedlings. A fluorescent bulb will work also. Grow lights provide light without heat, and they require very little energy use.
Write it Down —One of the first lessons NYBG teaches is the importance of keeping records of what we do so we learn what works in our growing environment, which differs from everyone else’s growing environment. Make a chart that has key dates on it, such as sowing, germination, pricking out (putting in individual containers), potting (transplanting to 4” pots) and fertilizing. For each seed you plant, fill in the chart as you go. Be sure to include the name of the plant, the seed company and date on the seed packet. It’s ok to use seeds from previous years, but expect the rate of germination to diminish from year to year, even if you store the seeds properly. Proper storage means putting the seed pack in a sealed plastic bag in the produce drawer of your refrigerator, which should be about 40°.
Visit your Botanical Gardens. I’m so grateful to have a resource like The New York Botanical Garden not too far from where I live in southern Dutchess County, NY. Every visit, whether I am taking a class or not, is an educational experience. Many towns have their own botanical gardens. You can learn a lot and get ideas for your own gardens there.
I grow flowers. What are you growing?
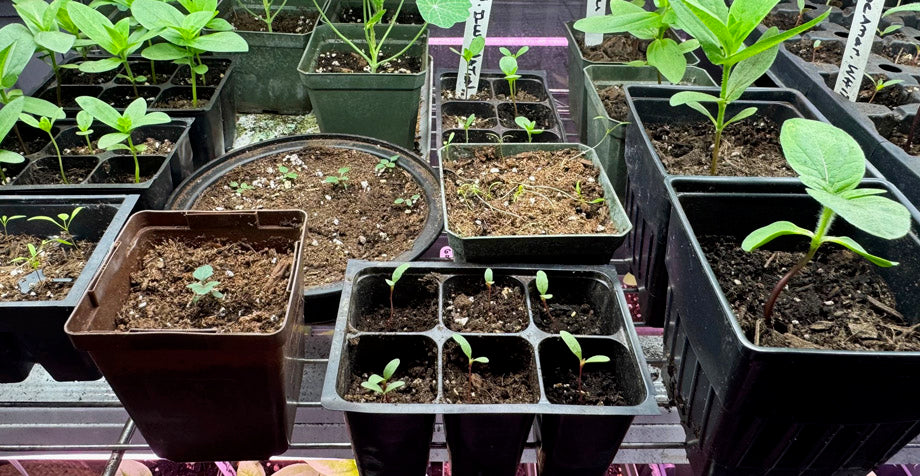
 Dorian's grow light set up at home. There are about 150 seedlings growing.
Find similar articles:
Flower Gardens Garden Planning Indoor Gardening Presenting "The Curious Gardener" Spring Projects