


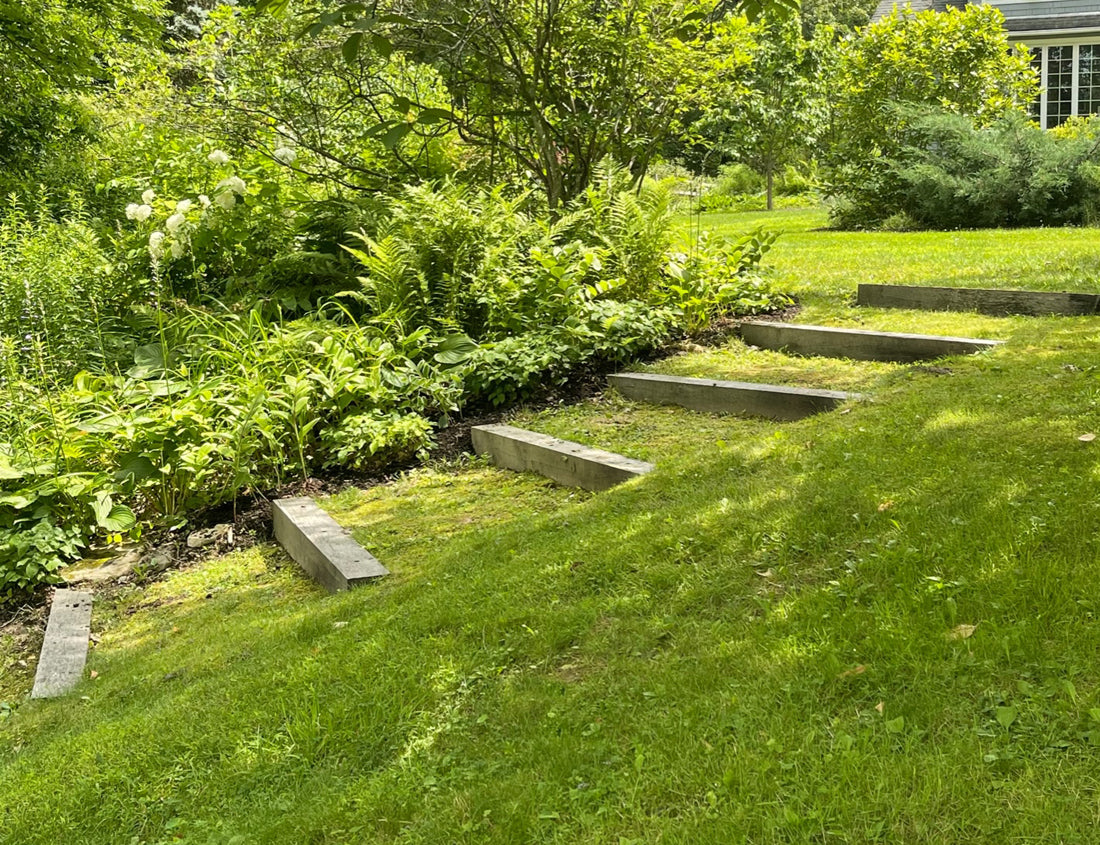
The steps I put in leading down to the pond and stream are made of wood. I chose to make wood steps because the cost of a stone path would be prohibitively expensive. The stones themselves and the labor to move them into position, given the length of the hillside (40-50') and the inaccessability of the site to a delivery truck, made that approach very expensive.
After installing the wood steps I was happy with the choice as I felt it achieved some important objectives, both functionally and from a design standpoint. Functionally we now had an easy way to get down the hilly slope in all seasons. From a design standpoint, it created a simple line that leads the eye down to the pond and stream, the pond being a feature on our property that was often invisible or overlooked. The steps also provide a visual border for the unruly area on the hill.
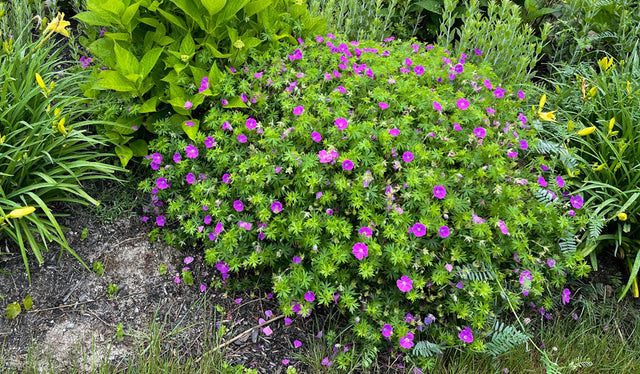
Starting with the edge along the steps I've planted a border of variegated Solomon's seal and epimedium, both shade loving perennials. Behind those are ferns and hosta that were growing there already. I'll gradually replace the other plants in that area, including some invasives, with plants of my choosing, but for now the border along the steps looks very pretty when walking down the steps, and driving in the driveway. Click here to see a video.
How To Build Wood Steps:
- Measure the space you have for the steps and determine how far apart you want each step. For a steeper grade you can add more steps. For a more gradual grade like mine, we planned one step every 3-1/2 feet.
- I ordered wood from a lumber mill about an hour away. I asked them for their toughest wood and they suggested 6" square locust beams. Oak is even stronger but they didn't have oak in square beams. I determined the length of each step should be 5' and asked them to cut the wood to size. Don't be timid about the length of your steps. After determining how heavy the planks would be I decided with my husband that we would need to take both of our cars to pick them up and save our shocks.
- When we got the wood planks home I laid them into position on the hill.
- I was told to purchase 24" rebars for securing the beams to the hillside. Three rebars per step.
- I hired a husband-and-wife team of masons who were willing to do the project. They cut the earth behind each step and laid the beams into position. Then they drilled holes in three places on each beam and hammered the rebars into the ground.
How To Build Stone Steps:
My friend Debbie had stone steps put in for a path leading from her driveway down to the vegetable garden area on her property. The length of her path was about 20' and it was accessible to the driveway where a truck was backed up with the stones, each weighing about 100 lbs!

- Debbie measured the length of the path to determine how many stones she needed to purchase. The stones were delivered by the stone yard. It's best to order a couple more than you think you'll need, just in case.
- Starting at the bottom of the hill each stone was laid into position by professionals.
- The way hers was built, each flat piece is anchored in place by the edge of the stone above it. This prevents the stones from moving out of position or from rocking in place over time.
It's an absolutely lovely path that she has planted with creeping thyme and seasonal bulbs and perennials.